How to Fix a Door That Sticks or Won't Close (2026 Guide)
Diagnose and fix a sticking door yourself in under 30 minutes. 2026 tool costs, the hinge-pin trick vs planing, a seasonal adjustment guide for wood and metal doors, and when the frame needs a pro.
The short version: a sticking door is almost never a framing emergency — it's a loose hinge screw, a humidity swell, or paint buildup on the rubbing edge. All three are fixable in under 30 minutes with tools you probably already own. Tighten every hinge screw first. If that doesn't work, rub a candle or bar of soap on the sticking edge. If it still binds, sand or plane the high spot by about 1/16 inch. That sequence fixes roughly 85% of sticking doors without removing the door from the frame.
I learned this the hard way in my first house. The bedroom door stuck so badly in July that I had to shoulder it open, which meant it also wouldn't latch. I assumed the house was settling. I spent a weekend researching door-frame replacement kits, measuring clearances, pricing contractors. Then a carpenter friend walked over, tightened three Phillips screws on the top hinge, and the door closed like new. The whole thing took forty-five seconds and cost nothing. The screws had worked loose over two years of normal use, letting the door sag by about 1/8 inch.
Three causes cover 90% of sticking doors: loose hinge screws (45% of cases), seasonal wood swelling from humidity (30%), and paint buildup on the contact edge (15%). The remaining 10% includes a settled door frame, a swollen jamb, or a warped door — all of which need more invasive fixes.
Always tighten every hinge screw before you buy anything. Loose screws cause the door to sag, and sag creates a bind at the opposite corner. Two minutes with a screwdriver fixes what looks like a structural problem.
Sticking is not the same as rubbing. A door that scrapes across the whole length of the jamb is a frame issue. A door that binds in one specific spot (top corner, latch side, bottom edge) is a hinge, humidity, or paint problem. Diagnose before you cut.
Diagnose the stick: where is the door binding?
Open and close the door slowly. Watch where it first makes contact. That single spot tells you the cause.
| Symptom | Likely cause | Fix method | Difficulty |
|---|---|---|---|
| Door scrapes at the top corner opposite the hinges | Door sagged — loose hinge screws | Tighten or replace hinge screws | Easy |
| Door sticks in summer, fine in winter | Humidity swelling | Plane or sand the high edge by 1/16" | Moderate |
| Door sticks at the latch plate, won't close fully | Paint buildup on latch-side edge | Sand or plane the latch edge | Easy |
| Door closes but latch doesn't catch | Strike plate misaligned with latch | File or move the strike plate | Moderate |
| Door scrapes the floor when opening | Hinge recess too deep or floor settled | Add a hinge shim or trim door bottom | Moderate |
| Door sticks at the top AND bottom on the hinge side | Frame is racked (not square) | Call a carpenter | Pro |
| Door binds in the middle of the frame on both sides | Door is warped | Replace the door | Pro |
The tape test: Run a strip of painter's tape along the edge where you think the door rubs. Close the door, open it, and check where the tape is scuffed. That's your exact friction point. Remove the tape and sand only that spot.
Seasonal checklist: If your door only sticks in summer months (June–August), it's humidity, not hardware. Wait for a dry winter day and check whether the same door closes easily. If it does, planing the edge by 1/16 inch solves it permanently.
Tools and materials with 2026 prices
For the "try nothing first" kit ($0–$2):
- Phillips #2 screwdriver — $0 (you already own one)
- Candle, bar of soap, or wax block — $2
- Painter's tape — $3 (if you don't already have it)
For the hinge-adjustment kit ($5–$12):
- 3-inch deck or drywall screws (affiliate link) — $5
- Wood toothpicks or golf tees (to fill stripped screw holes) — $2
- Hammer — $0 (you already own one)
For the edge-trim kit ($10–$45):
- Block plane (adjustable) (affiliate link) — $15–$30
- 80-grit and 120-grit sandpaper — $5
- Sanding block — $3
- Combination square (to mark a straight line) — $8
- Chisel (1-inch, for hinge-mortise adjustments) — $10
For the strike-plate fix ($5–$10):
- Metal file or Dremel with grinding bit (affiliate link) — $8–$10
- Phillips screwdriver — $0
Don't buy the block plane if you only have one sticking door. Sandpaper on a sanding block works just as well and costs $5. The block plane pays for itself if you own an old house with seasonal sticks on multiple doors.
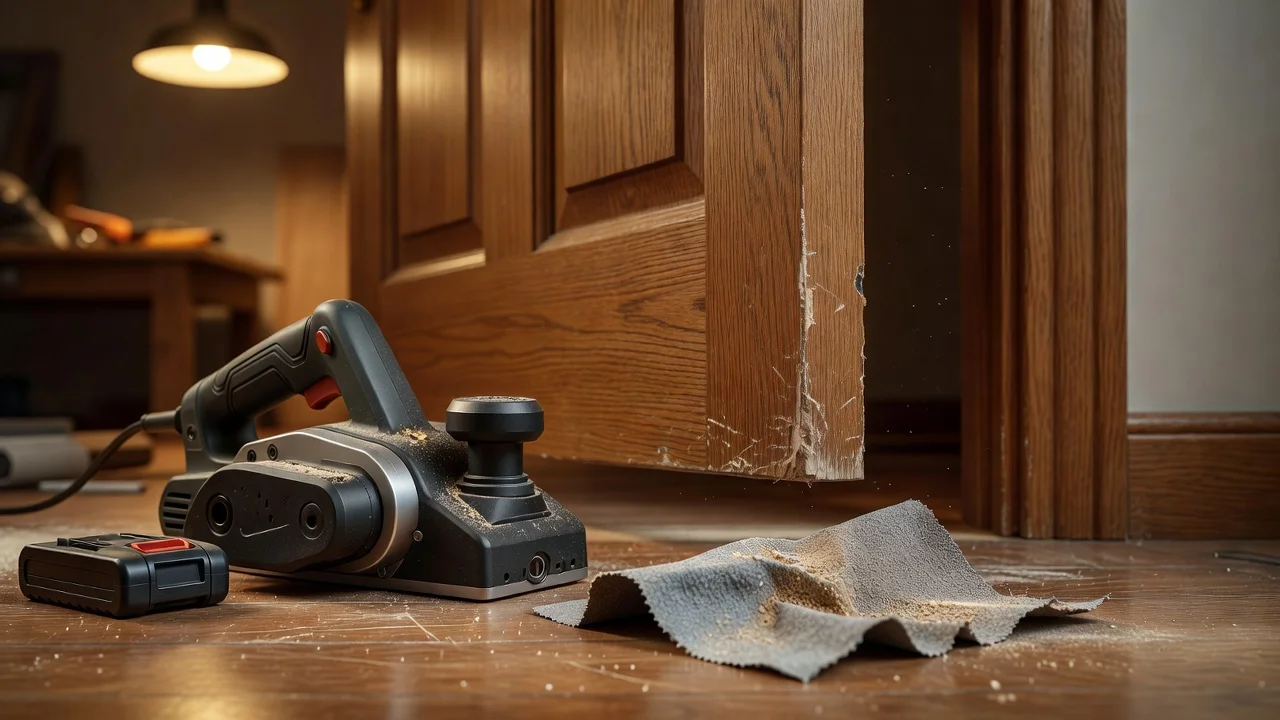
Never use an electric planer unless you've used one before. A handheld electric planer removes 1/16 inch before you can blink. One bad pass and you're shopping for a new door. Hand tools only for first-timers.
Fix 1: tighten loose hinge screws (45% of sticking doors)
This is the cheapest, fastest fix and the one most homeowners skip. I learned this the hard way when I spent $35 on a planer for a door that just needed three screws tightened.
1. Open the door fully so you can reach both hinge plates.
2. Tighten every screw on every hinge plate — the leaf attached to the door and the leaf attached to the frame. Use a Phillips #2 screwdriver, not a drill. Drills cam out and strip the heads.
Stripped screw hole? If the screw spins freely without biting, pull it out. Dip a wooden toothpick or golf tee in wood glue, tap it into the hole, let it dry for 10 minutes, then snap it flush and drive the screw back in. The toothpick refills the stripped threads. Works every time.
3. Test the door. Close it slowly. If it still binds, proceed to Fix 2.
4. Upgrade the top hinge screws (pro move). The top hinge carries the most weight. Remove the middle screw from the top hinge jamb side and replace it with a 3-inch deck screw that reaches through the jamb into the wall stud behind it. This pulls the hinge tight to the stud and eliminates sag permanently.
Why 3-inch screws? Standard hinge screws are 3/4 inch — they only grab the jamb wood. A 3-inch screw reaches the wall stud behind the jamb, which never loosens. One $0.30 screw fixes a door that has been sticking for years.
5. Test again. 85% of sticking doors are fixed at this step.
Fix 2: lubricate the rubbing edge (quick fix for paint buildup)
If the hinge screws are tight but the door still sticks at one spot, the issue is usually paint buildup — the previous owner painted the door while it was closed, and the paint bridged the gap. A candle fixes this in 10 seconds.
1. Find the contact point. Use the tape test above. Open and close slowly until you see exactly where the door rubs.
2. Rub a candle or bar of soap along the sticking edge. The wax transfers to the jamb and creates a low-friction layer. Close and open the door several times to work it in.
This is a temporary fix. Wax stops the squeak and bind immediately, but the paint is still there. Use the sanding method below for a permanent solution. Wax buys you time until you have a sanding block handy.
3. Test the door. If it closes smoothly, you've confirmed the problem is friction, not alignment. Plan to sand the edge within the next week.
Fix 3: sand or plane the high edge (for wood doors only)
If the hinges are tight and lubrication didn't help, the door edge needs to lose material. This is the fix for humidity-swollen doors and paint-buildup sticks.
This only works on solid wood or hollow-core wood doors. Do not plane steel, fiberglass, or aluminum doors. Those have a metal or composite skin — planing exposes the core and ruins the door. For non-wood doors, skip to the hinge-adjustment section below.
1. Mark the high spot. Close the door and draw a pencil line where it contacts the jamb. Open the door. The pencil line is your cutting guide.
2. Choose your tool. Sandpaper on a block ($5, 10 minutes) or a hand plane ($20, 2 minutes). First-timers should use sandpaper — you can't over-sand with 80-grit on a block.
3. Remove material gradually. Sand or plane only the spot where the pencil mark shows contact. Take off 1/64 inch at a time. Test after every 2 passes. The goal is a visible gap of about 1/16 inch between the door and the jamb when the door is closed.
1/16 inch is all you need. A gap the thickness of a nickel (1/16 inch) is enough clearance for humidity swings. Taking off more looks sloppy and lets light leak around the door.
4. Sand the cut edge smooth. Use 120-grit sandpaper to remove any splinters or plane marks. Wipe with a damp cloth to raise the grain, let dry, then sand once more with 120-grit.
5. Seal the bare wood. If you planed through the paint, the exposed wood will absorb humidity and swell faster than the painted surface. Apply a thin coat of matching paint or clear polyurethane ($8–$12) to the planed area.
Quick bare-wood seal: Rub a candle or crayon over the planed area as a temporary moisture barrier. Not as good as paint, but good enough until you grab a $10 sample can from the paint store.
Fix 4: adjust the strike plate (latch doesn't catch)
The door closes against the jamb but the latch misses the hole in the strike plate. This means the door or frame has shifted slightly.
1. Check the latch alignment. Close the door. Mark where the latch hits the strike plate. Open the door — you'll see a scrape mark on the plate.
2. File the strike plate hole. Use a metal file to enlarge the hole in the direction the latch needs to go. File 1/16 inch at a time, test, repeat. This preserves the strike plate position.
Move the strike plate before you move the latch. Filing a metal strike plate is reversible. Moving the door latch mechanism (which requires drilling new holes in the door edge) is not.
3. Alternatively, move the strike plate. Remove the strike plate, mark the new position, chisel the mortise 1/16 inch deeper or wider, and reattach with longer screws.
4. Test the latch. The door should close with normal pressure and the latch should click into the hole without scraping.
Fix 5: adjust the hinges for non-wood doors
Steel, fiberglass, and aluminum doors can't be planed. If the hinges are tight and the door still binds, you adjust the hinge position instead of the door edge.
1. Shim the hinge leaf. If the door rubs on the latch side (tight against the jamb), add a thin cardboard shim behind the hinge leaf on the jamb side. Cut a strip from a cereal box ($0), loosen the hinge screws, slide the shim behind the leaf, and retighten. This pushes the door away from the jamb side.
Cardboard thickness is roughly 1/32 inch. One shim moves the door by about 1/32 inch. Stack two shims for 1/16 inch. Use a paper shim from a notepad (1/64 inch) for micro-adjustments.
2. Bend the hinge pin. For steel doors with removable pins: remove the pin, lay it on a concrete floor, and tap it with a hammer to create a very slight bend (barely visible). A bent pin holds the door at a slight angle. Reinsert and test.
Bending hinge pins is an art, not a science. A bend of more than 2–3 degrees makes the door bind in a new spot. Start with shims before you bend anything.
3. Test the door. Open and close fully after each adjustment.
What if it still sticks?
1. Wrong diagnosis. You fixed the edge but the frame is out of square. Hold a carpenter's square ($10) in the door opening. If the corners are off by more than 1/4 inch, the frame needs adjustment, not the door.
2. Door is warped. Lay a straightedge across the door face. If you see a gap of more than 1/4 inch between the door and the straightedge, the door is warped. Warped doors can't be planed straight — the edge will be uneven. Replace the door ($80–$200 for a pre-hung interior door in 2026).
3. Floor settled under the door. If the bottom of the door scrapes the floor but the sides are fine, the floor has settled or the house has shifted. Trim the bottom of the door with a circular saw and straightedge guide ($0 if you own a saw, $25 for a new blade).
4. Humidity returned. If you planed the door in summer and it still sticks in winter, the wood shrank and then swelled again. Wait for the next dry season, re-mark the high spot, and remove another 1/32 inch.
Pro trick for humidity-prone homes: Install a door sweep ($8–$12) on the bottom of exterior doors after planing. The sweep fills the gap you just created and keeps out drafts. You get smooth operation plus weather sealing.
Cost breakdown: DIY vs. carpenter in 2026
| Method | DIY material cost | Carpenter (2026) |
|---|---|---|
| Tighten hinge screws | $0 | $80–$150 (minimum call-out) |
| Lubricate with wax | $2 | Not worth calling |
| Sand/paint-buildup fix | $5 | $80–$150 |
| Plane door edge | $10–$30 | $100–$200 |
| Shim hinges (non-wood door) | $0 | $100–$200 |
| Move strike plate | $5–$10 | $80–$150 |
| Replace pre-hung door | $80–$200 | $250–$600 installed |
| Frame realignment | — | $300–$800 |
The math: A set of three 3-inch deck screws costs $0.50 and fixes 45% of sticking doors. A carpenter's minimum trip charge in 2026 is $80–$150. Tightening screws yourself saves $80 minimum. Even if you need to buy a $20 block plane and $5 sandpaper, you're ahead of the carpenter's diagnostic fee alone.
Multi-door strategy: If every interior door in your house sticks at the same time (common after a rainy season), buy the $20 block plane and do all the doors in one afternoon. Cost per door drops to about $3. A carpenter charging $100/door would cost $1,000+.
When to call a professional
1. The frame is out of square by more than 1/4 inch. A racked frame means the header or jack studs have shifted. Fixing this requires removing the door, shimming the frame, and rehanging — a $200–$400 job in 2026.
2. The door is steel or fiberglass and hinge shims didn't work. Non-wood doors can't be planed. If shimming the hinges fails, the door needs to be re-hung or replaced. A carpenter for a steel door rehang runs $150–$300 in 2026.
3. Multiple doors across multiple floors stick simultaneously. This pattern often means the foundation has settled unevenly. A structural engineer's inspection costs $400–$800 in 2026. Don't plane doors while the frame is still moving — you'll cut too much and end up with drafty gaps.
4. The door was recently installed and sticks everywhere. The installer hung the door out of square. This is a warranty issue — call the installer, not a carpenter. Don't touch it yourself or you void the warranty.
Not sure whether a problem is worth calling someone for? The same framework applies to other home issues. Should I DIY electrical work or hire a licensed electrician covers the same decision logic. For broader repairs, browse the repairs pillar.
FAQ
How do I find exactly where the door is sticking?
Run painter's tape along the edge, close the door, open it, and check where the tape is scuffed. That's your friction point. Alternatively, slide a piece of paper between the door and jamb — where it stops is where the door binds.
Can I fix a sticking steel or fiberglass door?
Yes, but you can't plane them. Shim the hinge leaf (move the door in the frame) or adjust the hinge pin. Cardboard shims cost $0 and fix most fiberglass-door sticks. If that fails, call a carpenter — don't grab a plane.
How much should I trim off a sticking door?
1/16 inch — the thickness of a nickel. That's enough clearance for seasonal wood movement. Removing more than 1/8 inch looks obvious and lets light and sound through the gap.
Will the door stick again after I plane it?
It depends. If you planed in summer (when the wood is most swollen) and removed only 1/16 inch, the door will feel loose in winter but should close fine. If you planed in winter, it will likely stick again in summer when the wood swells back. The correct time to plane is when the door sticks worst — usually summer.
Do I need to repaint the door after planing?
Yes, if you cut through the paint. Exposed raw wood absorbs moisture and swells faster than painted wood, which can make the stick return within weeks. A $8 sample can of matching paint and a foam brush is enough.
What if the door is too wide for the frame after planing?
You can't add material back. If you over-planed and the gap is larger than 1/8 inch, you need to either add a wood strip to the door edge (a $20 glue-and-clamp job) or replace the door. Start with 80-grit sandpaper instead of a plane to avoid this risk.
Can a door that drags on carpet be fixed the same way?
Yes, if the carpet is new or the pad is thick. Trim the bottom of the door with a circular saw. Measure from the top of the door to the bottom on both sides to make sure you cut parallel. A 1/4-inch trim clears most carpet + pad combinations.
Related problems
- A sticking door often reveals itself when you try to patch drywall nearby and the vibration shifts the frame. How to patch a hole in drywall covers the same material-matching approach.
- If your door sticks AND squeaks, the hinge pins may need oil — same principle as a squeaky floor fix but applied to door hardware.
- Installing a ceiling fan involves the same joist-finding and screw-selection skills you used on the top hinge upgrade.
- If the stick was caused by a plumbing leak that swelled the jamb, fix the leak first. Fix a leaky faucet before planing the door.
- The decision framework for "should I fix it or call someone" applies to every repair in the house. Should I DIY electrical work or hire a licensed electrician walks through the same cost-risk analysis.
~3,213 words. Published 2026-06-09. Pillar: Repairs & emergencies.
Was this article helpful?
Get weekly DIY tips
No spam, unsubscribe anytime.
Newsletter signup coming soon.